Rules
Search and expand sections for details.
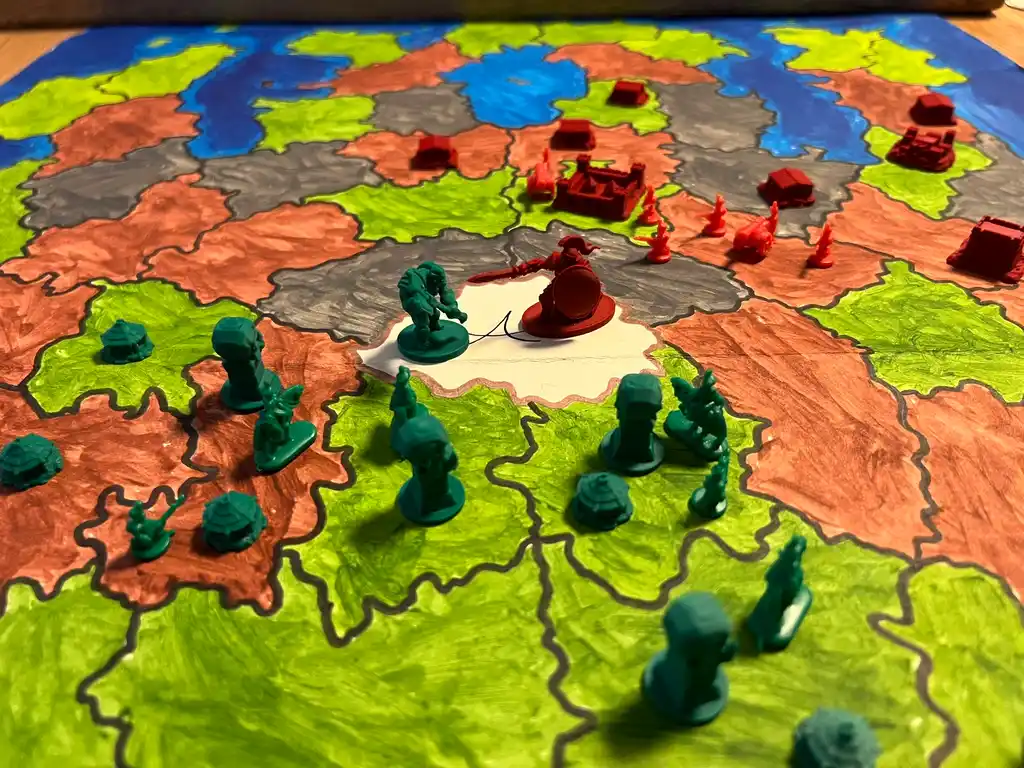
Battle for Aidra is a 2–6 player round-based strategy game with 6 unique asymmetric factions. Before the game begins, the players agree on how it will be won: see Win Conditions.
The players agree on a win condition before the game begins. Some conditions are bound to particular maps; Domination is available on every map.
Center Control
Requires a map with a designated center region.
Hold the center region for 6 rounds in total. The rounds do not have to be consecutive — your tally counts up over the whole game and is never lost.
- Your tally rises by 1 at the end of a round in which you hold the center. An attack late in the round therefore denies you that round's tick.
- Reaching 6 wins the game.
Domination
Available on every map, and always active — even when the players agreed on a different win condition, the last player left standing wins.
A player is eliminated once they have no units and no buildings left on the map. Losing an army while your cities still stand does not put you out.
Shared Victory
Shared victory belongs to Center Control only. Under Domination the last players standing must fight it out.
When a player moves a unit into the center while another player already holds it, both must immediately agree to share the victory — otherwise combat begins.
If they agree:
- No tally is reset. Each player keeps their own count, and both continue to tick up each round they hold the center together.
- Both may move any number of further units into the center, and either may break the truce at any time, immediately triggering combat.
Only 2 players can share the victory. If a third player enters, they must eliminate at least one co-holder before negotiating with the remaining one.
At the start of every round, before the movement phase, each player gains 1 influence — regardless of which economy phase they choose later in the round (see Influence).
Each round then has 2 phases:
- Movement phase: move, attack, and bombard. Each of these costs 1 influence (see Military Actions).
- Economy phase: choose either the production phase or the build & deployment phase — you cannot do both in the same round.
- Production phase: gain your resources for the round, and train units at your military facilities (barracks, forge).
- Build & deployment phase: deploy the units your facilities trained on previous rounds — each one in any region connected to the building that trained it by your infrastructure — then buy in this order: 1. units, 2. buildings, 3. upgrades, 4. action cards (see Action Cards & Deck Building).
Influence is the currency that buys actions rather than things. It is held by you rather than by a region, and it is what every military action is paid for with.
Influence accumulates: whatever you do not spend stays with you into later rounds, and there is no cap on how much you may hold.
Income
- 1 at the start of every round, before the movement phase — no matter which economy phase you choose later.
- Whatever your influence-generating buildings — trade posts, taverns, palaces, monuments — produce during the production phase. Buildings that train units generate no influence: their payoff is the unit and its free deployment.
- +1 for every unit or building you sacrifice (see Sacrifice).
Spending
- Military actions cost 1 influence each — every move, attack and bombardment (see Military Actions). Spend at any point during the movement phase, with no limit beyond the influence you hold.
- Resources: 1 influence buys 1 resource of your choice, as often as you like. Only during the build & deployment phase, and only before you build or buy anything. A trade post offers the better rate of 1 influence for 2 resources, but only once per post per round.
Because the resource trade is tied to the build phase, a round in which you take the production phase gives you no way to convert influence into resources.
Sacrifice
At any point during your own turn you may sacrifice one of your own units or buildings — remove it from the map and take 1 influence. There is no limit on how many you sacrifice; the unit itself is the price.
Moving, attacking, and bombarding are military actions, and each one costs 1 influence (see Influence).
Each of the following costs 1 influence:
- Move: move any or all units out of a single region.
- Attack: start a battle in a region.
- Bombard: fire with all ranged units in a single region.
There is no limit on how many military actions you take in a round other than the influence you hold. Since influence carries over between rounds, a player who has saved up can act far more often in a single round than usual.
Boats and generals move freely — without spending influence (see Boat Movement).
A battle is fought between two armies in a region, with no dice. A region holds up to 10 units, and all of them may take part.
Skirmishes
A battle runs as a sequence of skirmishes:
1. Both players secretly commit 1–6 units and place them on their own 2×3 grid.
2. Both reveal — units and grid order together. From here on, the order units will die in is public.
3. Both secretly pick one card.
4. Both reveal simultaneously and resolve.
5. The next skirmish begins, re-committing from the units that survived.
The battle ends when one side has no units left to commit. If both sides are wiped in the same exchange, the region goes neutral — neither player holds it.
Damage
The damage you deal is the summed strength of your committed units, and a unit's strength is also its hit points. Damage is spent front-first in whole units, reading the grid left to right, front row to back — slots 1 and 2, then 3 and 4, then 5 and 6. Whatever is left over after the last unit it can afford to kill is lost: there is no spill and no wound tracking, so a unit is either alive at full strength or dead.
A full front rank adds +2. If both slots of your front row are occupied, add 2 to the damage you deal — the rank is standing there either way.
Reductions
Incoming damage reductions stack, but only when both sides played a red card. They are fixed at reveal and do not change as units die during the skirmish:
- Unit-type diversity among your committed units: one type is 0, two types −3, three types −6.
- Any ⛨ value on your card that names the card they played.
Red and blue
Red cards lead to a damage exchange; blue cards do everything else. When one side plays red and the other blue, the blue side deals nothing and takes only the strike — the part of the attacker's army the red card sends in.
A strike is never reduced. A side that played blue is caught out of position and keeps none of its diversity; the attacker's +2 still applies, because that is the attacker's rank. A red card that does not name the blue card played does nothing at all — a wrong read whiffs completely, which is why Defensive and Flank are toothless against the entire blue half.
Card economy
Every card is once per battle — printed as 1× in the card's top-right corner — except Rest, marked ∞, which is never consumed. So red cards are renewable and blue cards are finite; the brake on that engine is that three of the five red cards punish Rest.
The red cards
- Berserk — +6 vs Charge, Adaptive and Flank. Strikes with your whole army against Retreat, Rest and Stall, and with your front row against Reposition and Bait. All committed units die after the skirmish.
- Charge — beats no red card. Strikes with your front row against Retreat, Reposition and Rest.
- Adaptive — −3 against Charge, Defensive and Flank. Strikes with your front row against Retreat and Rest.
- Defensive — −6 against Charge and Berserk, and nothing else.
- Flank — +6 vs Defensive, −6 against Charge. Playable only with cavalry committed. Damage you deal lands back-first, killing their rearmost unit first — which is where a player parks the unit holding their third type.
The blue cards
- Bait — playable only when you have fewer units committed than your opponent and units in the battle that are not on your grid. You secretly add units to your empty grid slots, or none; units already committed keep their slots. If they played a red card, their front two units are pulled into a new skirmish.
- Stall — passive stance. Deals nothing, takes nothing. Nullifies Bait.
- Rest — recover all five red cards and one other blue card. Never consumed.
- Retreat — as attacker, your committed units fall back to the region they came from; as defender, your units leave and the region is conceded.
- Reposition — playable only when you have units in the battle that are not on your grid. The skirmish re-runs. You re-select your committed units; their commit stands as revealed.
▸Show exampleHide example
Both sides commit six units of three types, strength 60, with both front slots filled. A plays Charge, B plays Defensive. Each deals 60 + 2 = 62. B reduces by 6 (three types) and a further 6 (⛨ against Charge), so B takes 50; A reduces by 6 only, so A takes 56. Defensive's read was worth exactly one unit.
Bombarding costs 1 military action and fires with all ranged units in a region. Every ranged unit has a bombardment value — the attack value it fires with, separate from the strength it fights with in a battle. You may focus every shot on one target (their bombardment values are summed) or split them across several targets in the same or different regions — with no limit on how you divide them (e.g. 2 units on one target, then 3 on another).
Each target is resolved as a single exchange: the attacker's total is the bombardment of the firing units, the defender's total is the target's strength. The attacker plays an attack card and the defender plays a defense card, then both add their card bonuses to that total. The higher total wins; ties go to the defender. If the attacker wins, the target is eliminated (a targeted building is destroyed). Buildings can only be targeted once every unit in the region has been eliminated; a targeted building uses its own strength as the defender's value.
Bombardment cards
Attacker *(red)*:
- Suppressive — +6 vs Conceal, Cover, and Disperse. The firing unit dies after this exchange.
- Direct Fire — +6 vs Disperse and Fortify.
- Indirect Fire — +6 vs Conceal and Cover.
- Barrage — +6 vs Conceal and Disperse. If the defender loses this exchange, they must retreat 1 unit.
Defender *(blue)*:
- Conceal — +6 vs Direct Fire.
- Cover — +6 vs Barrage.
- Disperse — +6 vs Indirect Fire.
- Fortify — +6 vs Suppressive and Indirect Fire. Costs 2 resources to play.
▸Show exampleHide example
An attacker bombards with two ranged units (12 bombardment each), focusing both on a fortress (20 strength) — attacker total 24. The attacker plays Indirect Fire; the defender plays Fortify. Fortify grants +6 vs Indirect Fire, so the defender totals 26, while Indirect Fire's bonuses (vs Conceal and Cover) do not apply. 26 > 24 — the fortress survives.
A region where all enemy units are eliminated can be handled in one of three ways. Whichever you pick, your army must out-strength the building: compare the summed strength of your units in the region against that building's strength, and you may resolve one building per round. A lone 10-strength infantry can take an 8-strength village but never an 18-strength city, and against two villages it must take them one round at a time.
- Destruction & looting *(villages & cities only)*: The building is destroyed at the start of the following round — the owner can recapture it during this time. Loot: villages yield 1×, cities yield 3× the region's resource. Other buildings can be destroyed but yield no loot.
- Occupation: The building remains intact but produces nothing for either player.
- Takeover *(villages & cities only)*: Pay 1× the region's resource for a village, or 3× for a city, to take over its production immediately. Resources are received from the following round onward. Orcs cannot take over cities.
Each region has 2 build slots. Every building occupies a number of them — shown as the SLOTS stat on its card — and you cannot build past a region's 2 slots: a region holds, for example, 2 villages, 1 city, or 1 fortress. Cities and fortresses take 2, most buildings take 1. On a water region this means at most 2 fishing boats.
Buildings must be raised on your infrastructure network — a chain of regions you hold that carry your buildings. Some buildings carry further placement requirements on top of that: a Spartan barracks, for instance, must be built next to a city. Any such requirement is printed on that building's own card.
Water regions work like any land region — they hold a resource and are gathered the same way.
Docks
A dock is built on a shore: the border between a land and a water region. Once built, you may build boats at the connected water region. A dock is not a military facility and grants no military action.
Fishing boats
A fishing boat gathers 1 food from the water region it occupies each round. Up to 2 fishing boats may work a single water region, just like villages on land. Fishing boats move 1 region per round and are lightly built — they are destroyed if bombarded.
War ships
A war ship moves 2 regions per round and can:
- Bombard enemy ships, or units and buildings in adjacent coastal regions, using the standard bombardment rules.
- Transport friendly land units across water (a Spartan war galley carries up to 5).
Boats may differ slightly between factions.
Boats move for free — sailing costs no influence, for fishing boats and war ships alike. Only cargo costs:
- Loading units onto a war ship costs 1 influence. The ship may sail on in the same action, so you can load and move in one turn.
- Unloading units onto land costs 1 influence, and that is the whole action — the ship does nothing else with it.
Before the game, each player builds a starting deck of Action Cards drawn only from their own faction. Every card has a point rating, and a deck must fit the faction's deck budget (shown on the faction's Action Cards tab) — so a faction of cheap cards fields many tricks, while a faction of expensive cards fields a few strong ones. Cards left out of your chosen deck are unavailable for the rest of the game.
Buying cards
During your build & deployment phase you may buy cards from your deck by paying each card's resource cost — the same step where you buy units, buildings and upgrades, taken last (after upgrades).
Playing cards
Playing a card you own is free and costs no military action; each card states when it may be played — during production, during a build phase, or during an engagement. Combat cards are played into the engagement they affect, adding their bonus to that exchange.
Once vs repeatable
A card marked 🔥 once is removed from play after a single use. Every other card is repeatable and may be played any number of times.
Each player starts with 3 food, 3 wood, 3 ore, and 3 influence.